

Result: Less than 30 minutes of downtime instead of hours roadside.
Justin Holmes is a District Sales Manager with 18 years of experience. His perspective on the tire inflation system stems from his time as an Area General Manager, during which he was directly responsible for fleet uptime and daily operations. Over the years, Justin has seen firsthand how the right trailer specs can make a real difference in productivity, reliability, and overall cost of ownership.
A trailer tire inflation system can be the difference between hours of roadside downtime and staying on schedule.
The Cost of Trailer Tire Downtime
Unplanned tire failures are one of the most common causes of trailer downtime. A single damaged tire can shut down a unit for hours, disrupt deliveries, and rack up service costs. For rental fleets operating on tight schedules, those delays add up fast.
Justin has spent nearly two decades managing and supporting fleet operations. His team depends on trailers that are ready to work every morning and capable of handling real job site conditions without constant surprises.
How a Trailer Tire Inflation System Prevented a Shutdown
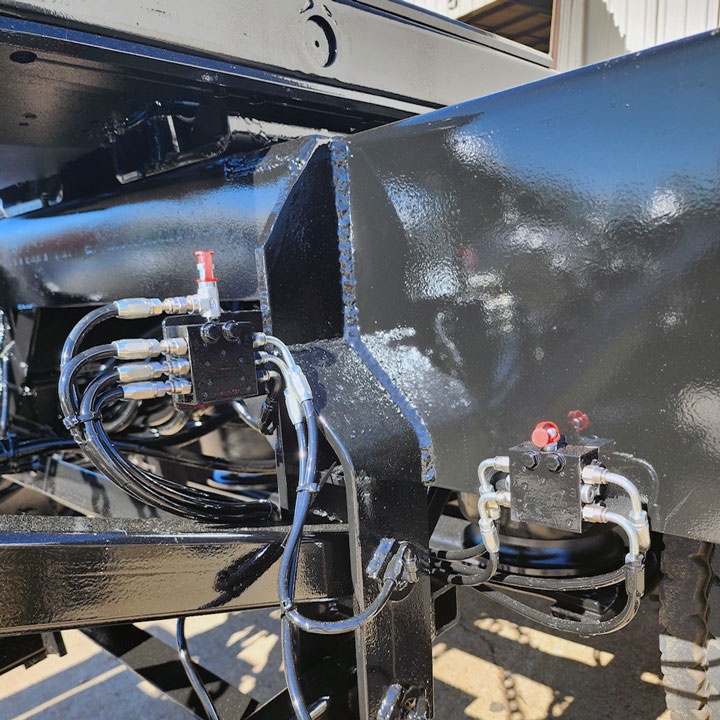
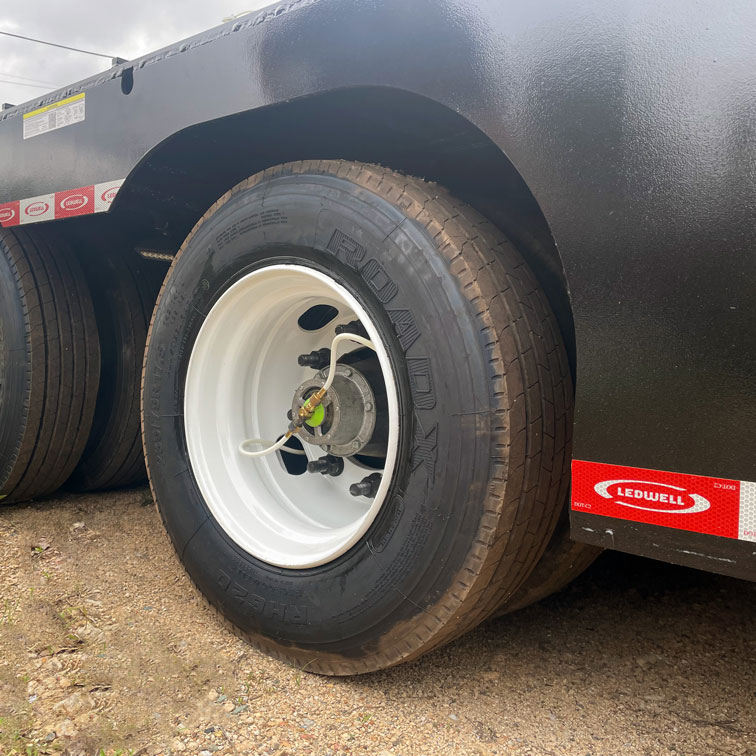
While exiting a job site, a driver clipped the right rear wheel of a trailer on a newly installed curb. The outside tire suffered a significant cut to the exterior sidewall. Almost immediately, the trailer’s tire inflation system indicator light came on.

The driver safely pulled over to inspect the damage and heard a hissing sound from the tire. In the past, an issue like this would have meant parking the trailer on the roadside and waiting hours for a service truck.
After assessing the situation, the driver determined the trailer could be moved a short distance back to the branch for repair. Despite the visible damage and air loss, the installed tire inflation system continued supplying enough pressure to help the tire maintain its shape.
Dispatch contacted the tire shop located next door to the branch while the driver was en route. Once back, the driver unloaded, pulled next door, and had the tire repaired immediately.
Total operational impact: Less than 30 minutes.
Without the inflation system, the outcome would have been very different. The driver would have remained parked roadside while dispatch arranged service. Even in a best‑case scenario, downtime would have been around two hours. More commonly, Justin’s team sees three to four hours of lost productivity for a single tire event.
Beyond lost time, roadside service calls cost much more than bringing equipment directly to a shop. For this one incident alone, Justin estimates savings of $400 to $500.
Operational and Cost Benefits for Fleet Managers
Reduced Downtime and Faster Repairs
Since installing the tire inflation system, Justin has seen improvements beyond emergency situations. Fewer morning surprises from flat or underinflated tires have helped keep equipment ready to work when the day begins.
Improved Tire Life and Daily Reliability
Justin has also noticed more even tire wear compared to trailers without the system. Driver confidence has increased, especially when it comes to interior tires that are harder to visually inspect. Immediate notification when an issue occurs allows teams to address problems before damage escalates.
The indicator light has become one of the most valued features, alerting drivers the moment there is a problem rather than discovering it hours later.
Return on Investment Over the Life of a Trailer
While Justin stops short of assigning an exact dollar figure to total savings, the math extends beyond emergency breakdowns alone. Over the life of a trailer, it would take only about six incidents like this to cover the cost of the system. However, even without frequent roadside events, the system continues to deliver value through more consistent tire pressure, more even tire wear, and fewer premature replacements. Those everyday savings add up quietly over time, reducing tire spend across the fleet while improving reliability. Everything beyond those initial scenarios becomes pure cost savings.
Built for Safety and Long-Term Reliability
Justin has long trusted Ledwell trailers for their durability and support, but he believes the tire inflation system has become the single most influential differentiator in trailer specifications.
“I would not consider purchasing another trailer without it being installed,” he says.
From safety and uptime to long‑term cost control, the system has proven itself where it matters most, on the road and on the job site.
Although the system has not been in service long enough for full lifecycle data, Justin anticipates a 15-25% improvement in tire life compared to trailers without inflation systems. Even without those final numbers, the early results have already justified the decision.
From productivity and customer experience to cost savings and fleet reliability, he believes tire inflation systems should be a standard specification, not an upgrade.
For operations that cannot afford downtime, this system helps keep trailers working, drivers moving, and schedules intact, exactly what Ledwell equipment is built to do.