YOUR TRUSTED PARTNER FOR CAT DEALERS
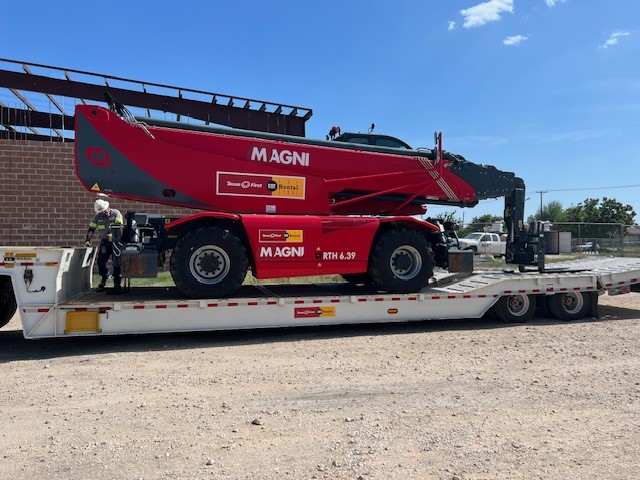
We’ve built over 5,000 machines for CAT fleets, many of which are still in service today. We proudly support 95% of CAT dealers nationwide. Through our Ledwell CAT Premier Program, we offer industry-leading support, customized solutions, and tough builds. Our goal is to help drive your business forward with swift service and unmatched quality.
Ledwell leads the way in truck body and trailer solutions for CAT Dealers with the most extensive chassis inventory in stock. With the shortest lead times in the industry, we ensure you can meet customer demands quickly. We help you maximize uptime by delivering fast, reliable products tailored to your needs.
When you partner with Ledwell, you get more than equipment. You get a dedicated team focused on helping you succeed. Our experts work with you to source the right trucks, trailers, and equipment for your dealership. Count on Ledwell to deliver the quality, reliability, and service you need to keep your business moving forward.
Best-selling Rental Trucks & Trailers

The Ledwell CAT Premier Program drives CAT Dealers forward with industry-leading support and tailored solutions that maximize their business potential.
VISIONARY FLEET
ASSESSMENT
Get the most from your fleet. We’ll review your equipment to ensure it aligns with your unique business needs by offering:
Fleet Optimization
In-depth evaluation to identify underutilized or outdated equipment for better performance.
Tailored Specifications
Customized recommendations to maximize operational efficiency, profitability, and equipment stowage while ensuring compliance with DOT guidelines.
ROI Evaluation
We assess your return on investment to ensure you’re maximizing financial returns on current and new equipment.
Priority Allocation
You get what you need fast with access to critical machinery when you need it most.
UNRIVALED
SERVICE
Get back to work quickly. We’re committed to minimizing downtime for CAT dealers with:
Rapid Response Guarantee
We respond to questions and service needs with unmatched urgency, ensuring your operations keep running smoothly.
Dedicated Support Team
A personalized team of sales, parts, and service experts to address all your business needs.
Lowest Warranty Rate
With our tough builds and quality service, Ledwell delivers the lowest service incident rate in the industry.
EXPRESS PARTS
PROGRAM
Have the parts you need when you need them. This priority program keeps your equipment running with:
Custom-Made Parts
We manufacture 85% of our parts in-house, ensuring superior quality and availability.
Proactive Maintenance Insights
Get expert advice to avoid breakdowns and extend your fleet’s lifespan.
Priority Shipping
99% of parts are shipped within 24 hours of request, reducing downtime and keeping your fleet in action.
SCHEDULE FLEET ASSESSMENT
Rental Industry Resources
Ledwell Rental Trucks 4:25
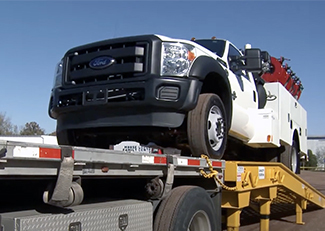
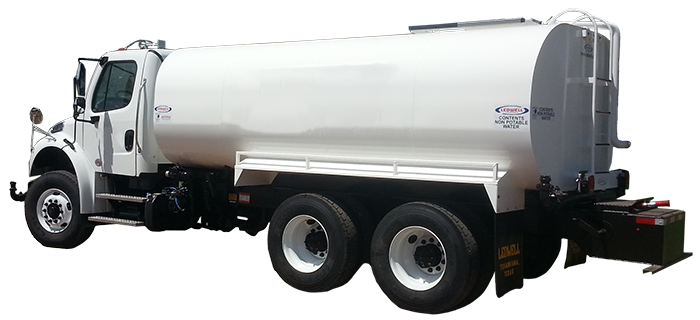
We specialize in trucks for rental companies, including Water Trucks, Rollbacks, Trailers, and Dump Trucks.
Why Ledwell 3:10
Learn about the people behind Ledwell’s trucks and trailers.
Ledwell Water Trucks 5:28
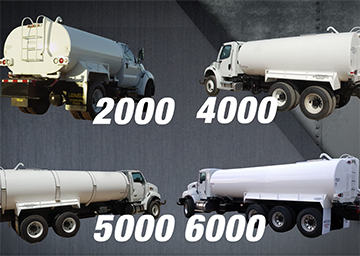
We have built thousands of Water Trucks over the years, and we know what it takes to get the job done.
Ledwell Hydraulic Tail Trailer 2:02
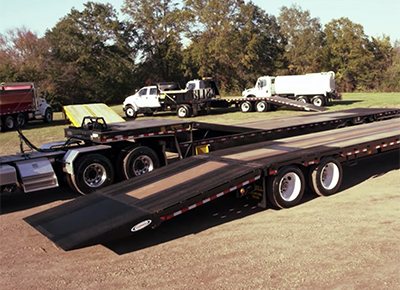
This versatile trailer offers multiple options for transporting equipment.
Frequently Asked Questions
Attenuator Truck
How do I operate a TMA Crash Truck?
Operating your Ledwell Attenuator Truck correctly is important to extend the life of your equipment. Watch this operational series video or follow the steps below.
To get started, walk around the entire truck to inspect the following:
Overhead and ground obstructions, Lights, Wheels & Tires, and Attenuator.
If needed, toggle the switch to turn on strobes and work lights.
Push the button on the in-cab control tower to raise the lightboard.
Set the light configuration as needed.
Deploy the Attenuator by pushing button on the in-cab control tower.
To use Cone Seat, remove the safety latch and slide open the gate. Enter workspace. Close the gate and install safety latch.
To remove Stake Side, release the latch and the lift panel up.
When finished with job, reverse the process to stow all equipment.
What does an attenuator truck do?
An attenuator is a crash cushion mounted to a truck’s rear. This type of truck is called an Attenuator Truck or sometimes a Crash Truck. These trucks can be seen in roadway work zones to protect workers from moving traffic. The attenuator absorbs impact when hit by a vehicle.
What is the purpose of a ballast box on an attenuator truck?
A ballast box is typically an empty metal box at the front of the bed. The box is used to provide the counterweight needed for proper usage of the attenuator based on state regulations. It is usually filled with heavy materials such as gravel or sand.
What does TMA stand for?
TMA stands for Truck Mounted Attenuator.
Water Trucks
How do you operate a water truck?
Learn to operate your Ledwell Water Truck correctly to extend the life of your equipment by following the steps below or watching this operation video.
Walk around the entire truck to perform a pre-trip inspection. Be sure to check the following: Wheels & tires, PTO for leaks, Driveline for connection, Pump bolts are tightened, and has slow drip at packing.
Primer Tank Valve to be closed if filling via fire hydrant or top fill
To fill tank: Fire Hydrant
Connect the hose with cam lock to fill the pipe at the rear of the tank.
Connect the other end of the hose to a fire hydrant.
Turn hydrant on to begin filling.
While filling the tank, beware of the Road Limit gauge at the tank’s front driver side.
To fill tank: Top Fill
Open manway lid at the top of the tank, if applicable.
Center opening of the tank with the opening of water source
To fill tank: Suction Hose
Close 4″ butterfly valve on the suction side of the pump.
Remove cam lock from suction pipe and attach fill hose.
Open the primer tank valve and allow water to fill the system.
Pull the bleeder valve to allow air to escape.
Engage PTO Set RPM to 1,800 – 2,000 to begin filling the tank.
Once the tank is full, Disengage PTO.
Shut primer tank valve.
Remove the fill hose and replace the camlock cap.
Open 4″ butterfly on suction.
To begin spraying:
Attach side spray, if desired Engage PTO and put the truck in gear.
Pull valves in the cab to activate nozzles – Front/Rear/Side.
Drive as needed to perform spray – being mindful of water movement in the tank
CAUTION: At high engine RPM, do not close all spray valves at once.
Disengage PTO
To spray via Hose Reel:
Engage PTO.
Manually open the gate valve at the rear passenger side of the tank.
Adjust nozzle as needed.
Disengage PTO
What should the output of my water truck be?
The pump on a Ledwell water tanker is set up to pump around 400GPM at 2000RPM engine speed with about 55PSI at the spray heads.
At this engine speed, you should receive a spray pattern of 55′ wide by 30′ deep and a side spray 65′ to 75’out.
Most PTOs are in the 111% to 126% range. The pump will peak at 2400-2500RPM (pump speed).
Can I haul and spray other liquids with my water truck?
Our tanks are lined with Lifelast coating to protect the tank from corrosion. This coating is tolerant of most chemicals with the exception of strong acids, aromatic hydrocarbons, ketones and chlorinated solvents. Always check the content before loading your tank with water mixed products.
The pump on my water truck is leaking. How do I fix that?
The pump is designed to leak in order to wet the packing and keep it cool. It should drip 40 to 60 drops a minute. It’s adjustable with the packing gland ring and the two threaded studs holding it. When all the adjustment is taken up, then it is time to replace the packing.
Wireless Remote
How do you pair a wireless remote to equipment?
Before beginning the procedure, make sure there are no other transmitters in the vicinity being operated, as this can cause issues with the dedication process.
Note that these receivers have the capability of storing two (2) unique ID codes, allowing the use of two (2) different transmitters.
1. Power up the receiver.
2. Locate the green ‘SETUP’ button on the bottom of the receiver as shown in the image to the right.
3. Press the ‘SETUP’ button 5 times quickly. The blue ‘POWER/ACTIVITY’ light will blink 5 times to confirm the correct entry.
4. Press the ‘SETUP’ button once. The ‘POWER/ACTIVITY’ light will blink once.
5. Press any button on the transmitter that will be used with this receiver for at least two (2) seconds. The ‘POWER/ ACTIVITY’ light on the receiver will blink approximately 6 times, indicating that the code has been learned. (Note that on handhelds with system ON/OFF buttons, the ON button must be used in this step).
6. If a second handheld requires dedication, go to step 7. If not, the dedication process is complete.
7. Press the ‘SETUP’ button 5 times quickly. The blue ‘POWER/ACTIVITY’ light will blink 5 times to confirm the correct entry.
8. Press the ‘SETUP’ button twice. The ‘POWER/ ACTIVITY’ light will blink twice.
9. Press any button on the transmitter that will be used with this receiver for at least two (2) seconds. The ‘POWER/ ACTIVITY’ light on the receiver will blink approximately 6 times, indicating that the code has been learned. The dedication process is now complete
When I push buttons on my wireless remote, there are no lights.
There are two possibilities. Either your battery needs charged or you need a new battery. Try charging it. If there is no change, contact Ledwell.
My handheld remote and receiver seem to be pairing, but they are not operating my equipment.
Your air solenoids may be malfunctioning. Each solenoid has a button at its center. Use those to manually operate the air solenoids and ensure their responsiveness.
DO NOT ENGAGE THE PTO WHILE PERFORMING THIS TEST. AIR ONLY.
If there is still no operation, check the twist lock connector for corrosion on the pins.
Can I replace just the handheld portion of the wireless remote system?
Yes, we offer replacements for handheld wireless remotes. Contact our Parts Department to order.
Once you receive your new remote, you will need to pair it with the transmitter mounted on your equipment.
GET THE MOST FROM YOUR FLEET
Let’s review your equipment to ensure it aligns with your unique business needs.
